EnvironmentsGenerate your own environments and let us solve them for you!
Creating environments is at the core of the conda-package ecosystem. If you want to know more on how they work and how to make them locally check our mamba environment documentation To use the prefix.dev environment creation tool you need to be loggedin as it all runs in a private space.
How to use it?
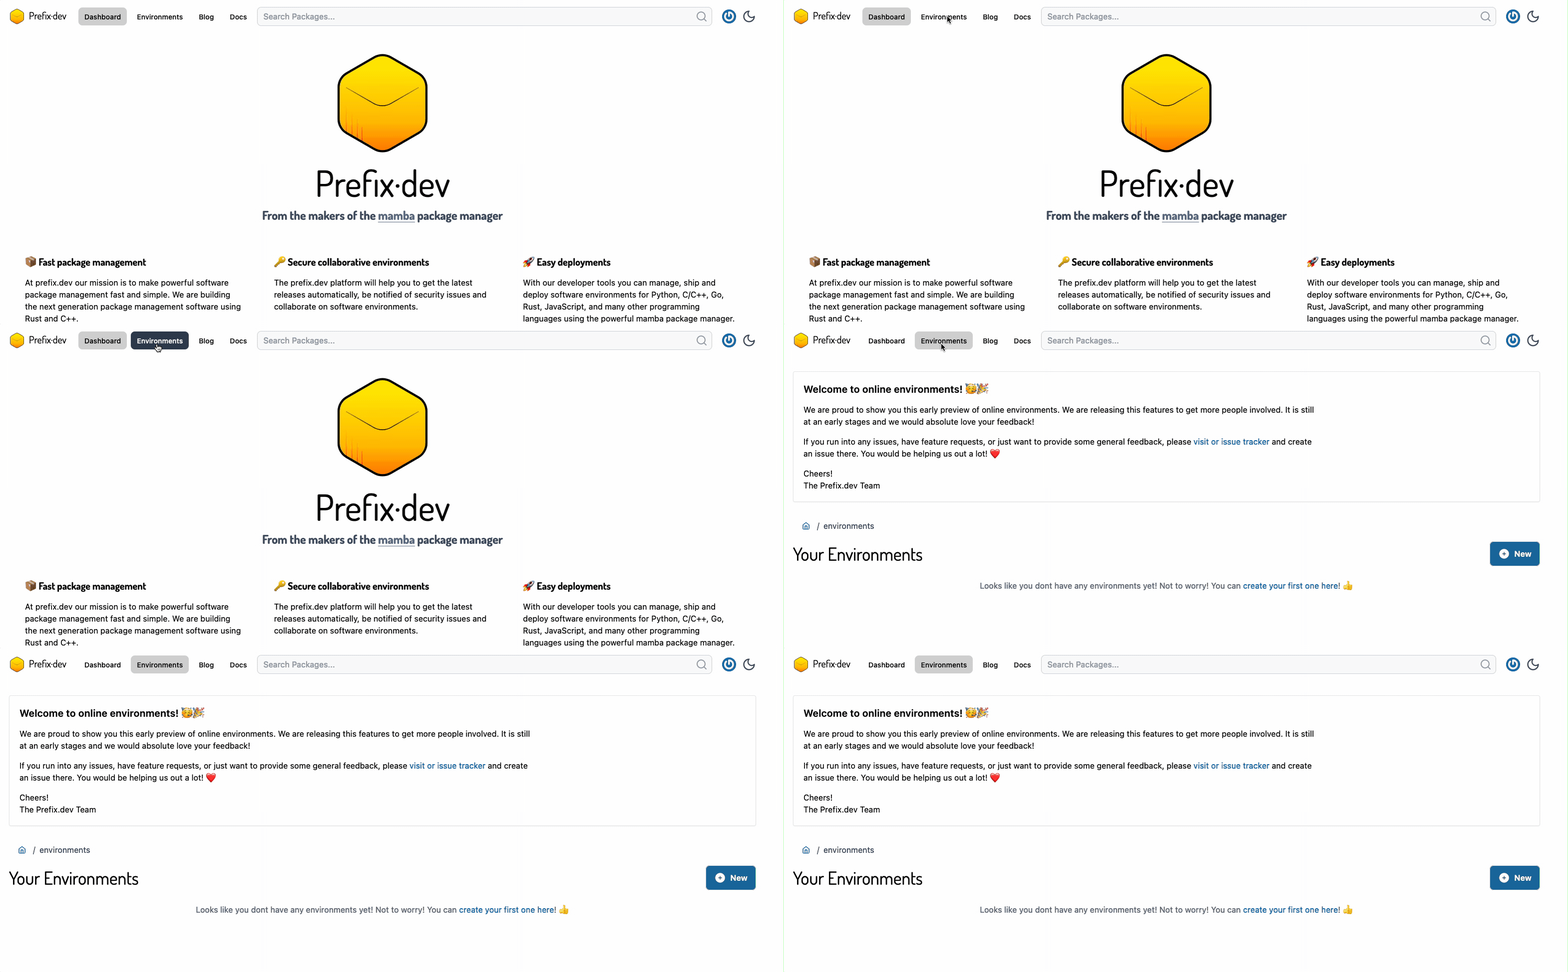
To use this feature you need to create an account on prefix.dev. You can also connect with Github or Google. Use the sign-in button on the home page. After you’ve done this, you can click on the environments button on the home page.

You are then presented with the page of the environments you have created. This is still empty, which is great! Let’s create a new environment.
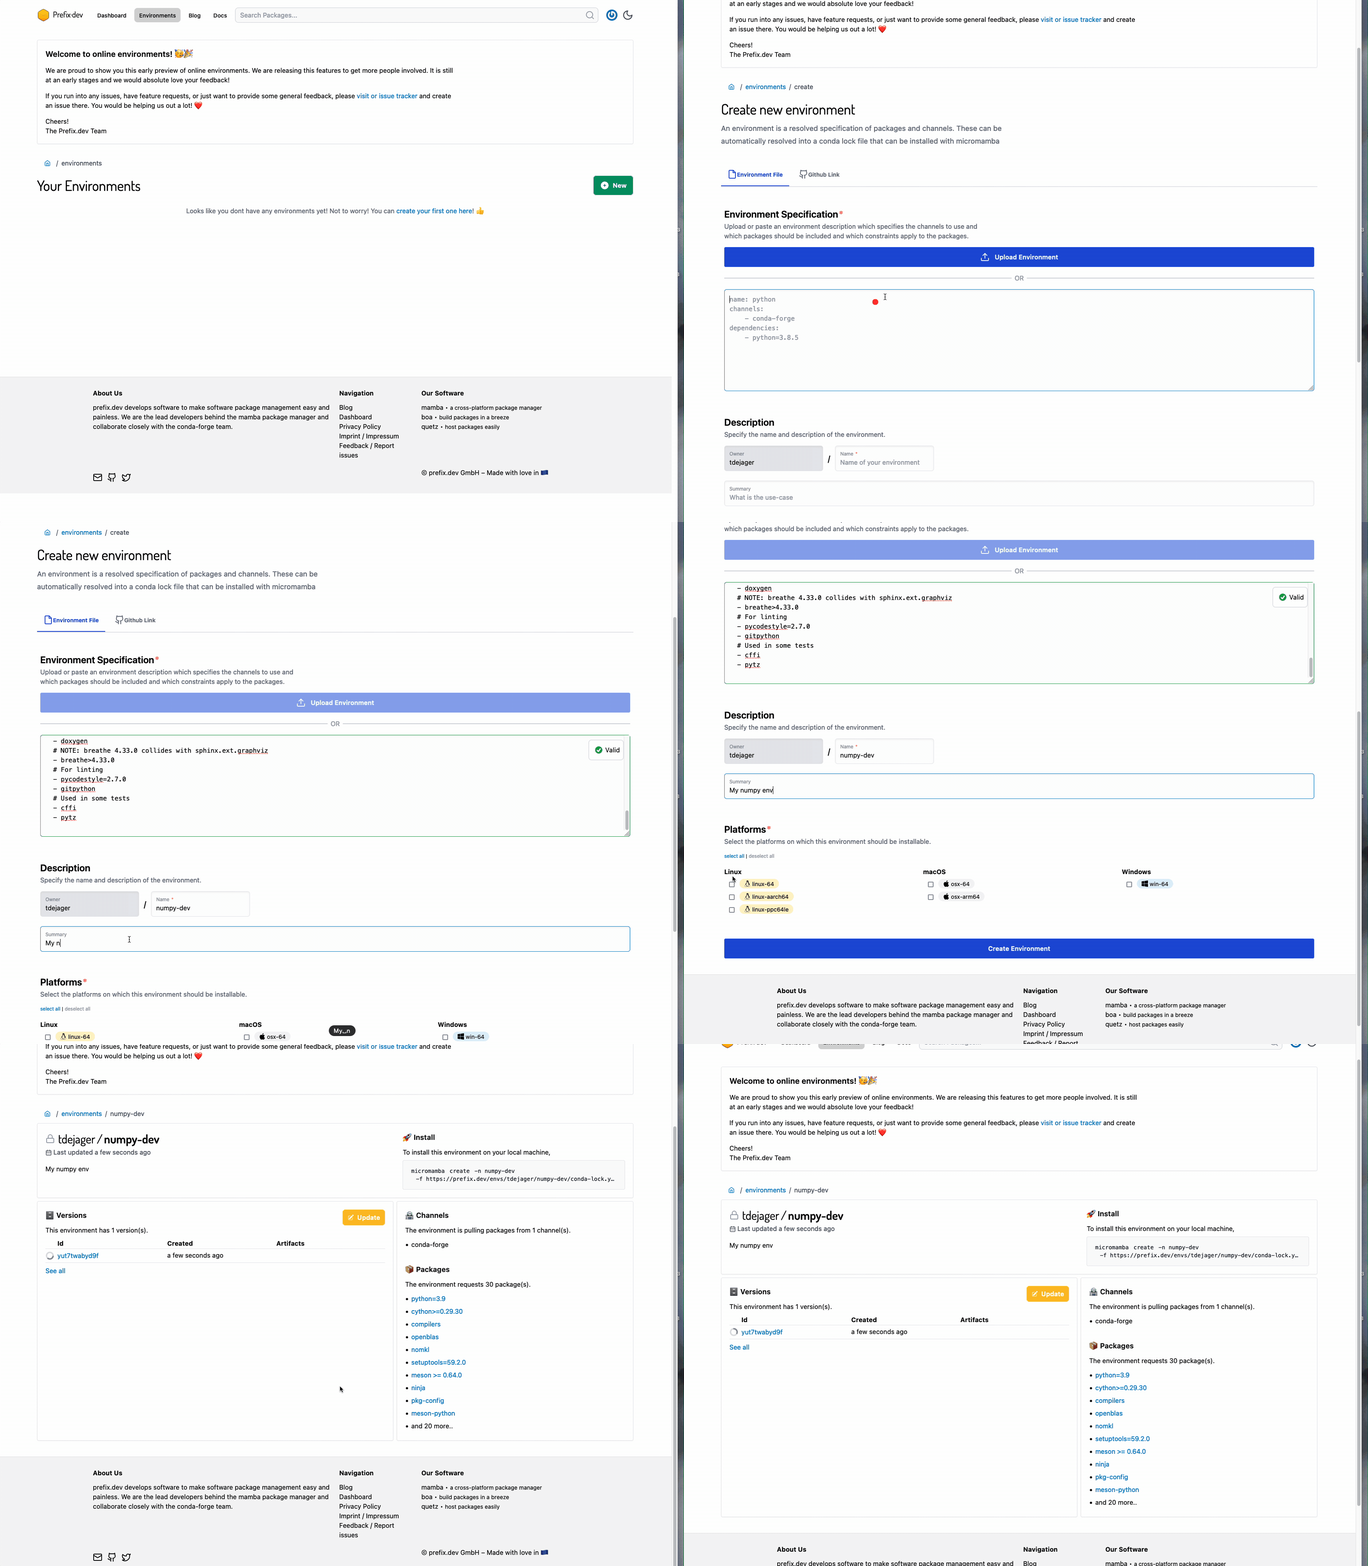
By pressing the new button we can create a new environment.
Let’s use the environment.yml from the numpy project.

We then proceed to give the environment an optional description and select the platforms we wish to solve for. We can observe the environment being solved online. An environment can have various 'versions', where we can alter the dependencies or the platform. Currently, the environments are behind a namespace defined by your username. That ensures they are unique over users.
Inspecting an environment
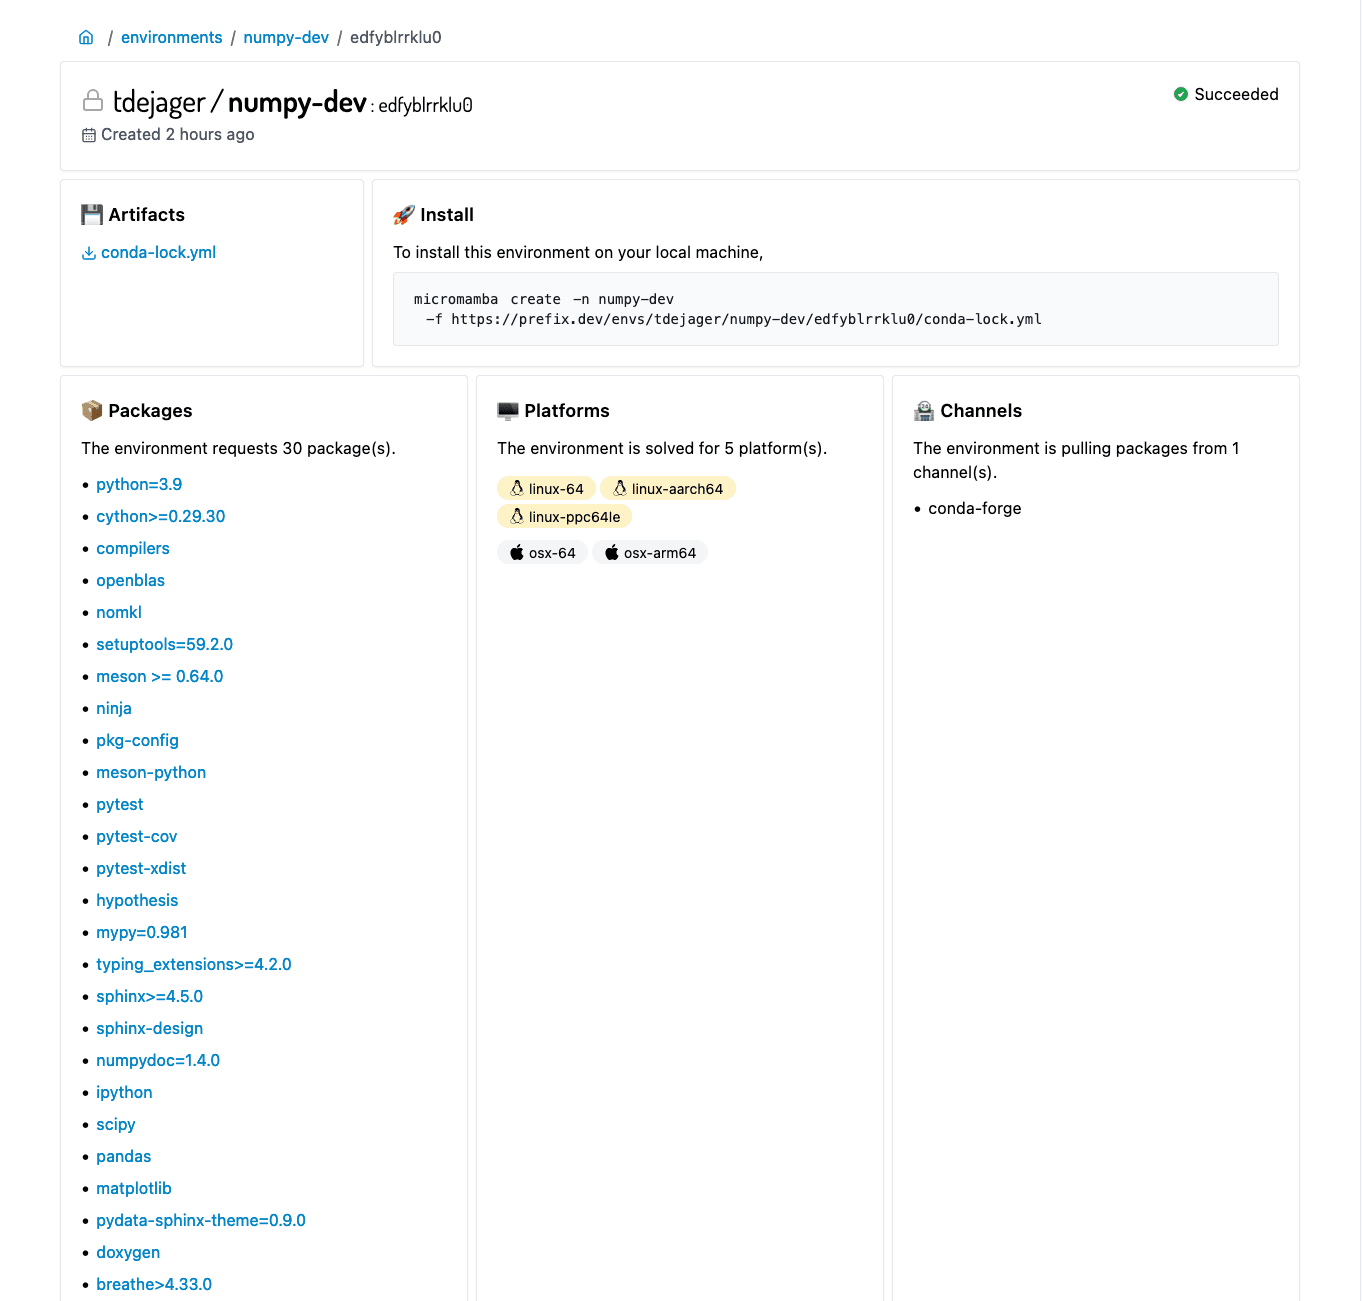
To inspect an environment, you can click on the environment version. And you get a page that looks like the following:

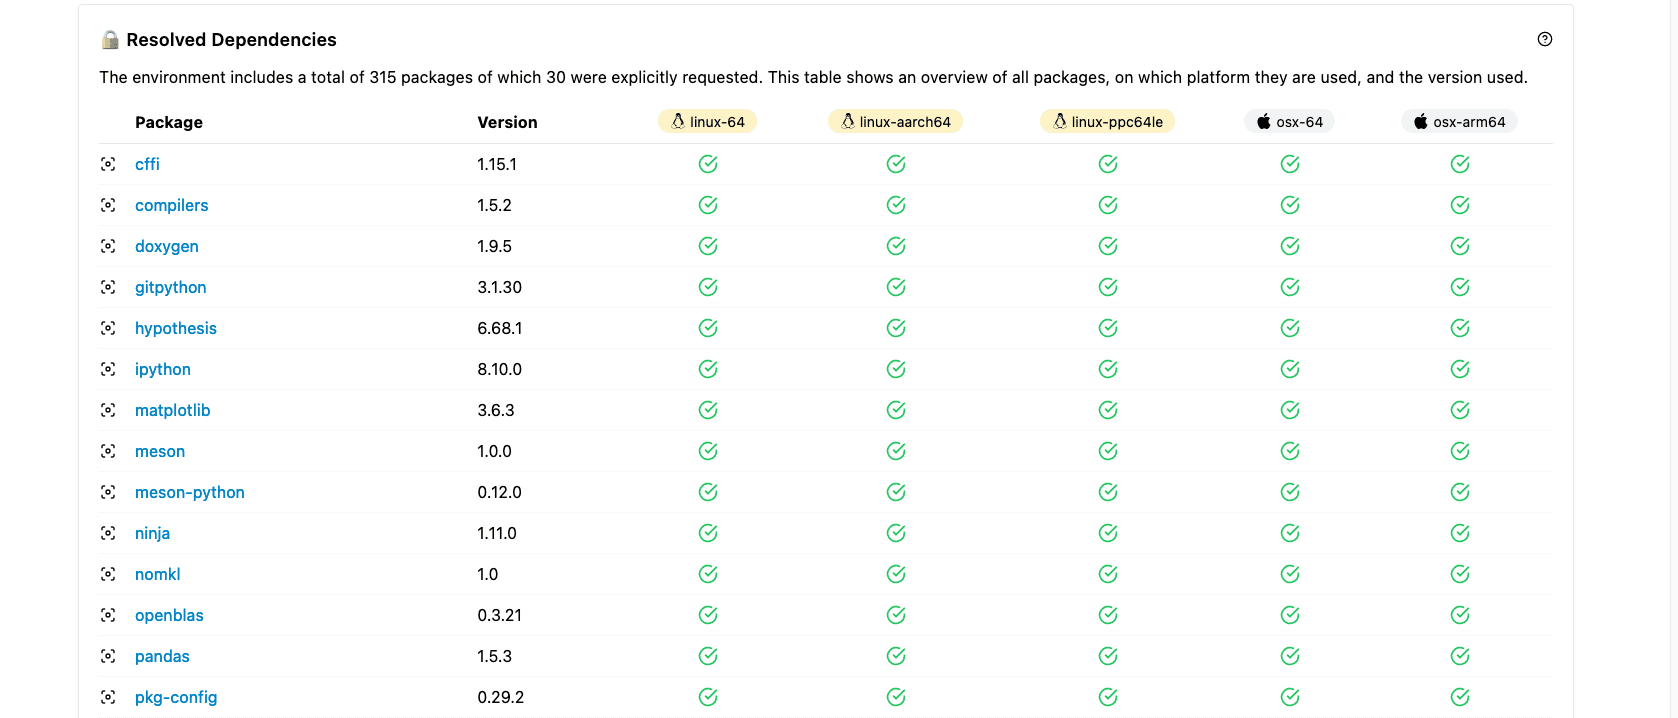
This shows you an overview of the requested packages, platforms and channels. When the environment has been solved successfully, we also see the following table:

I’ve only added part of it in the image, but the table renders a conda-lock.yml file that shows you what packages have ended up in the lock file.
Creating the environments locally
To create the environment locally, run the command shown in the installation box:
micromamba create -f https://prefix.dev/envs/tdejager/numpy-dev/edfyblrrklu0/conda-lock.yml -n numpy-devThis assumes you have micromamba installed. This is what it looks like on my machine locally: