:focal(smart))
A New Pixi Login Flow
Increasing the security of our users is a top priority these days. That’s why we’ve added OAuth 2.0 support to prefix.dev. You now have a fancy login-flow for Pixi and other tools.
We also added scopes to “Trusted Publishing” (renamed to repodata access) so that you can easily authenticate your repositories in Github or Gitlab to pull, push or delete. And API keys used to have broad permissions - now you can scope them on channels (read/write/delete) as well.
Before, signing pixi into prefix.dev meant generating an API token in the dashboard and pasting it back into your terminal:
pixi auth login prefix.dev --token pfx_xxxxxxxxxxxxxxxxxxxxxxxxxxxxxx
Now:
pixi auth login prefix.dev
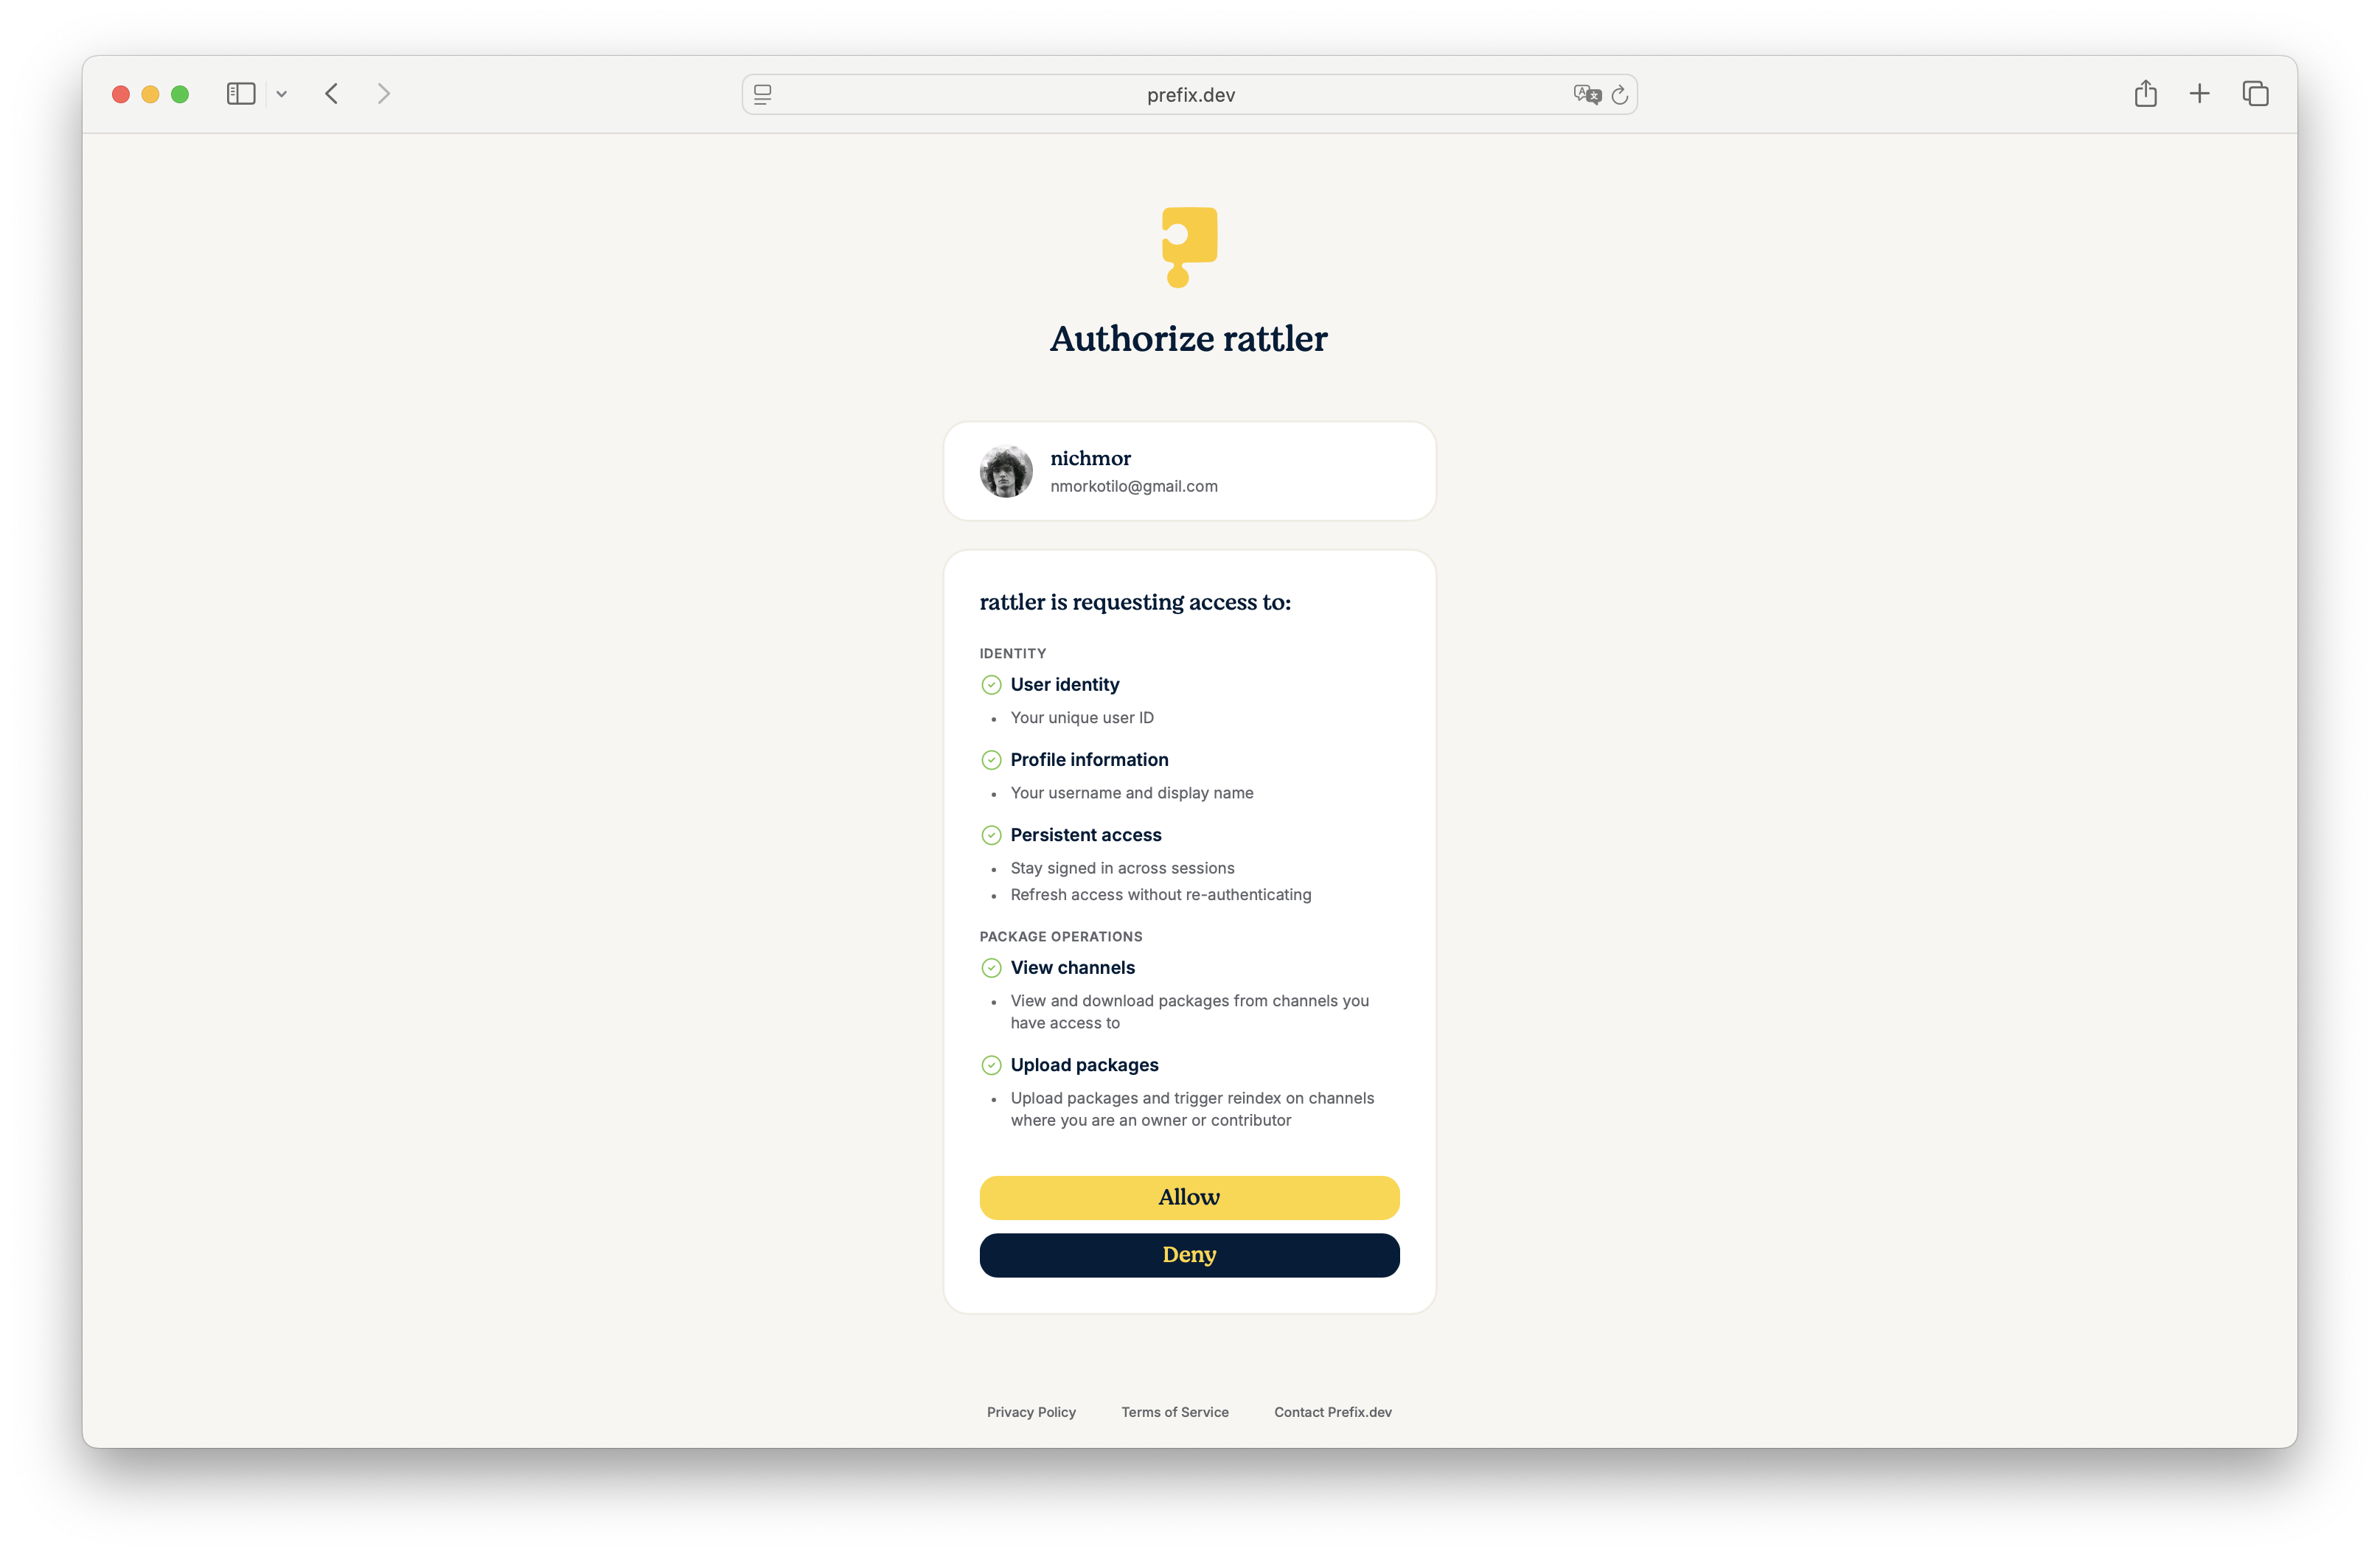
A browser window opens, prefix.dev shows you the consent screen with the exact scopes pixi is requesting, and accepting them signs you in.
Scoped tokens and a renamed trusted publishers
We have two ways for machines to authenticate with our platform:
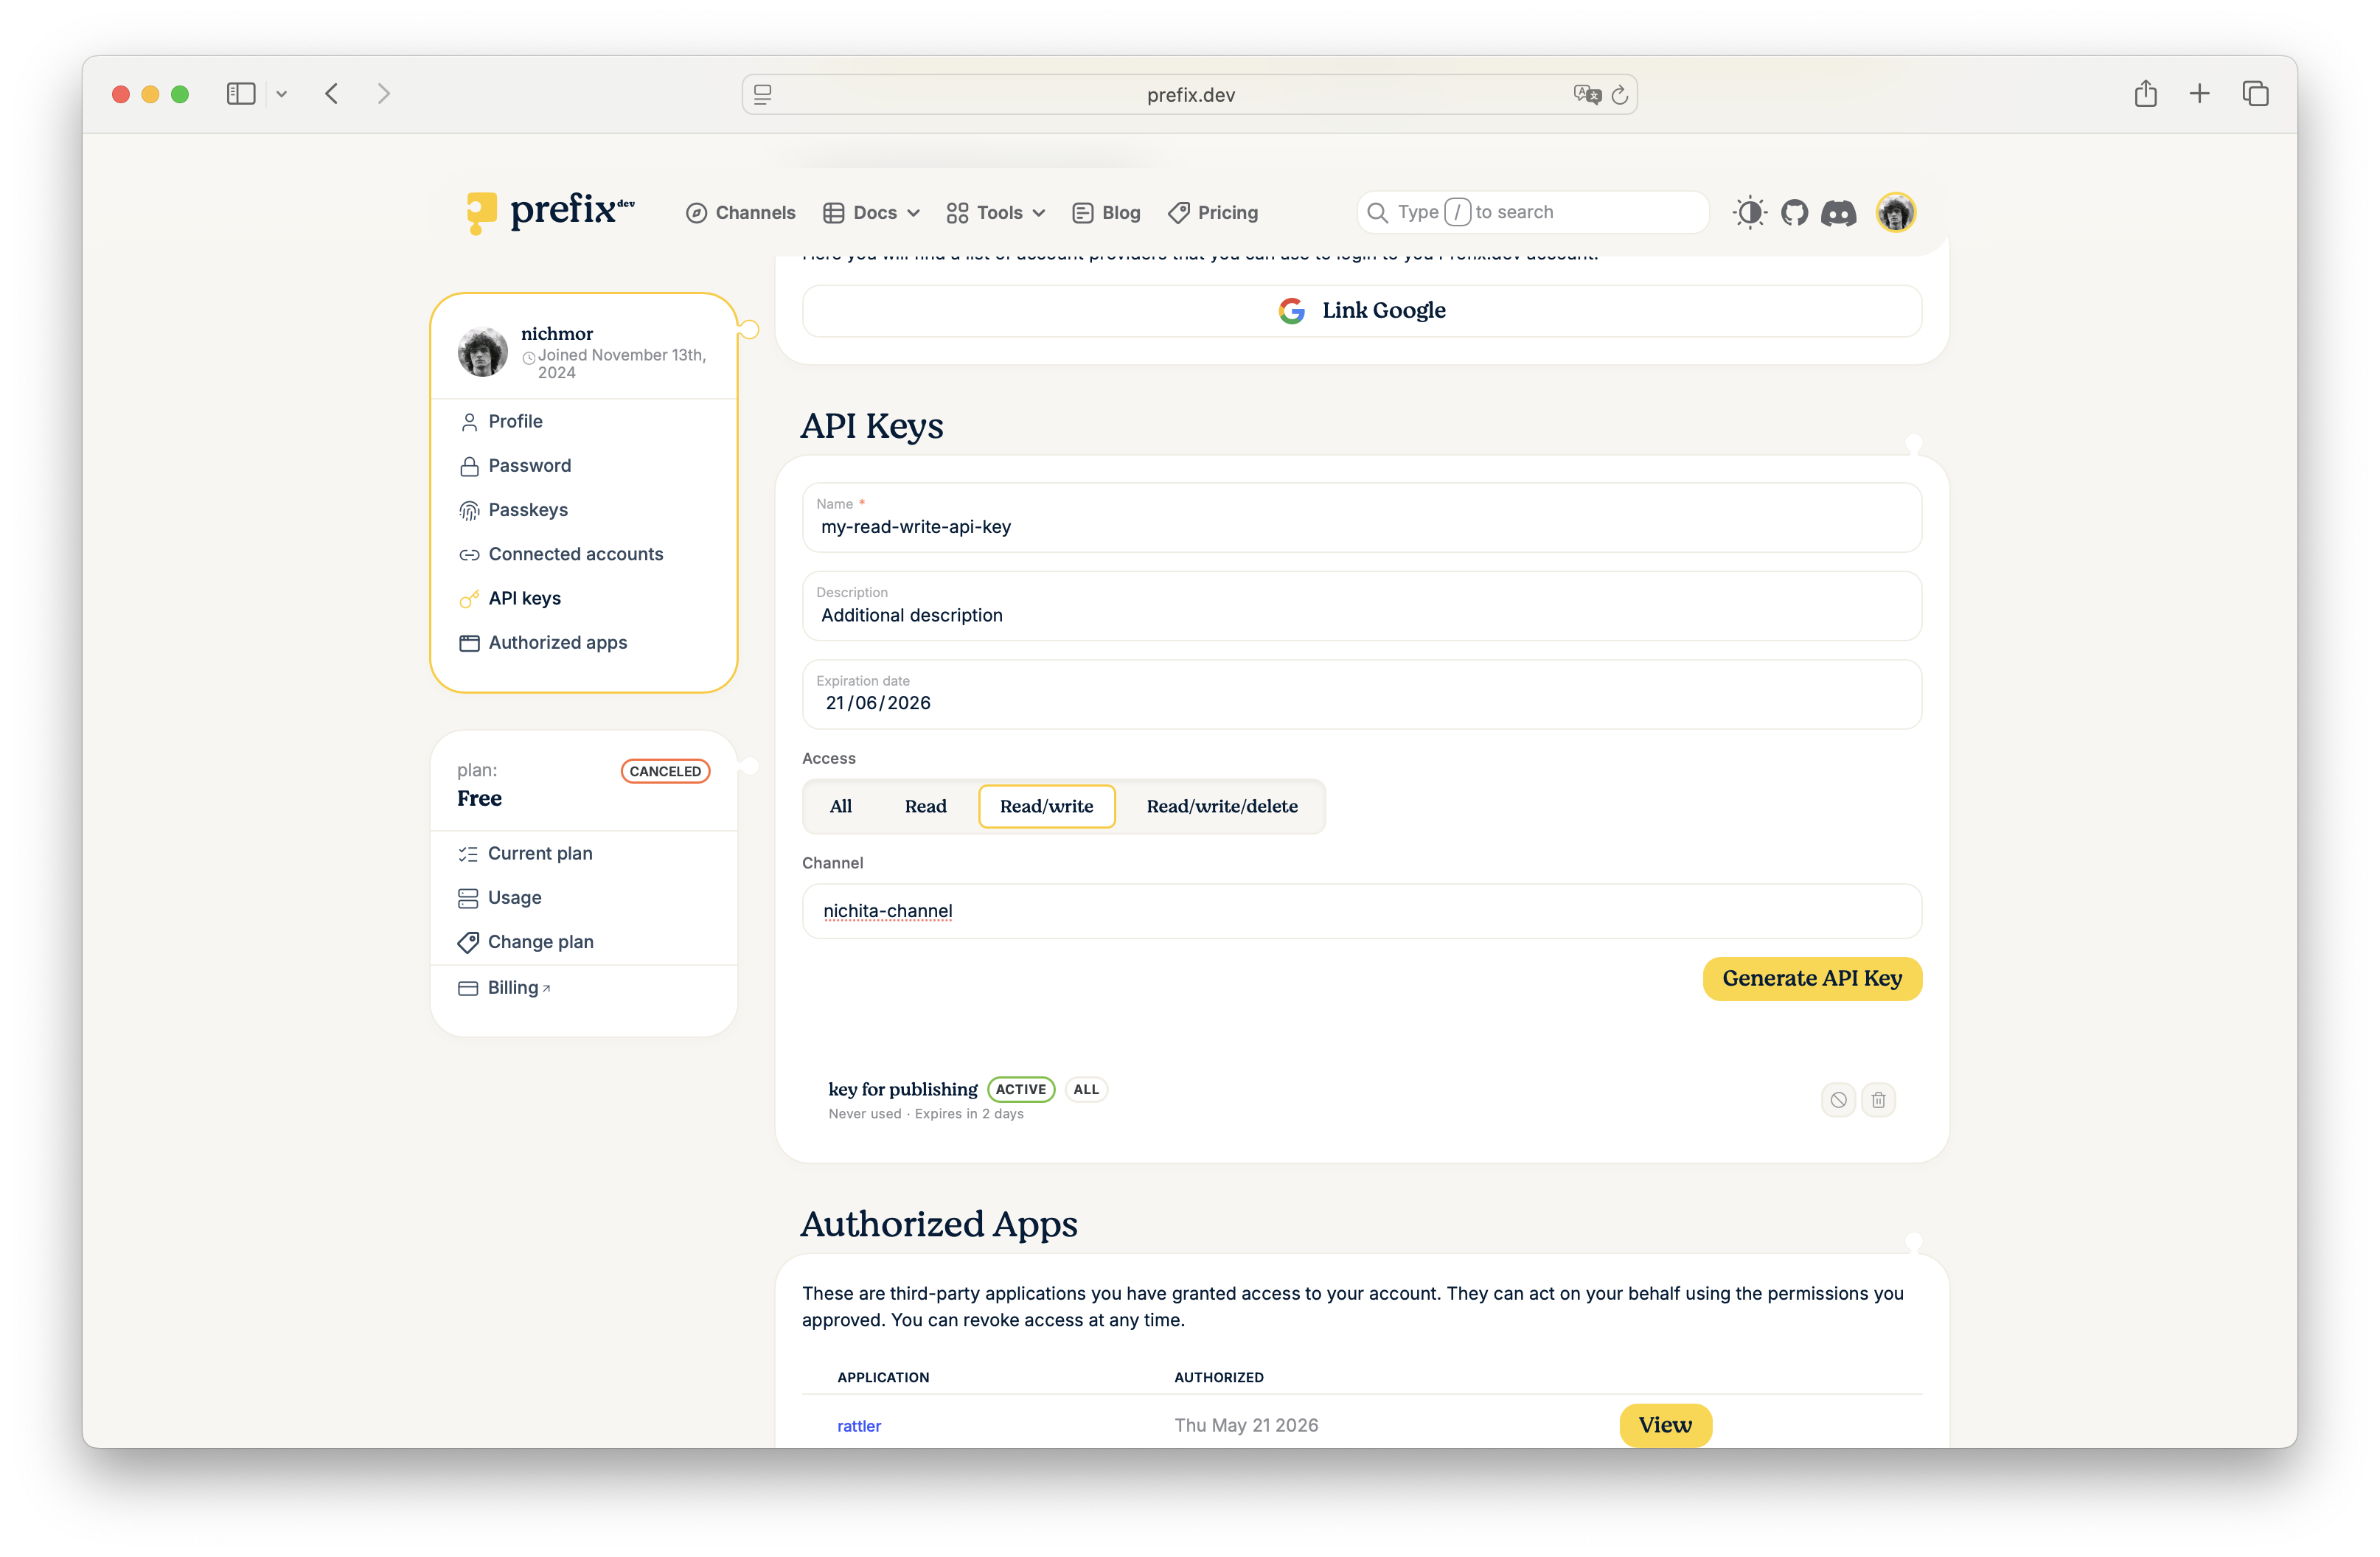
API keys: not really the recommended way but sometimes necessary. With our latest changes you can scope API keys to a given channel, giving a combination of read/write or delete/yank access.
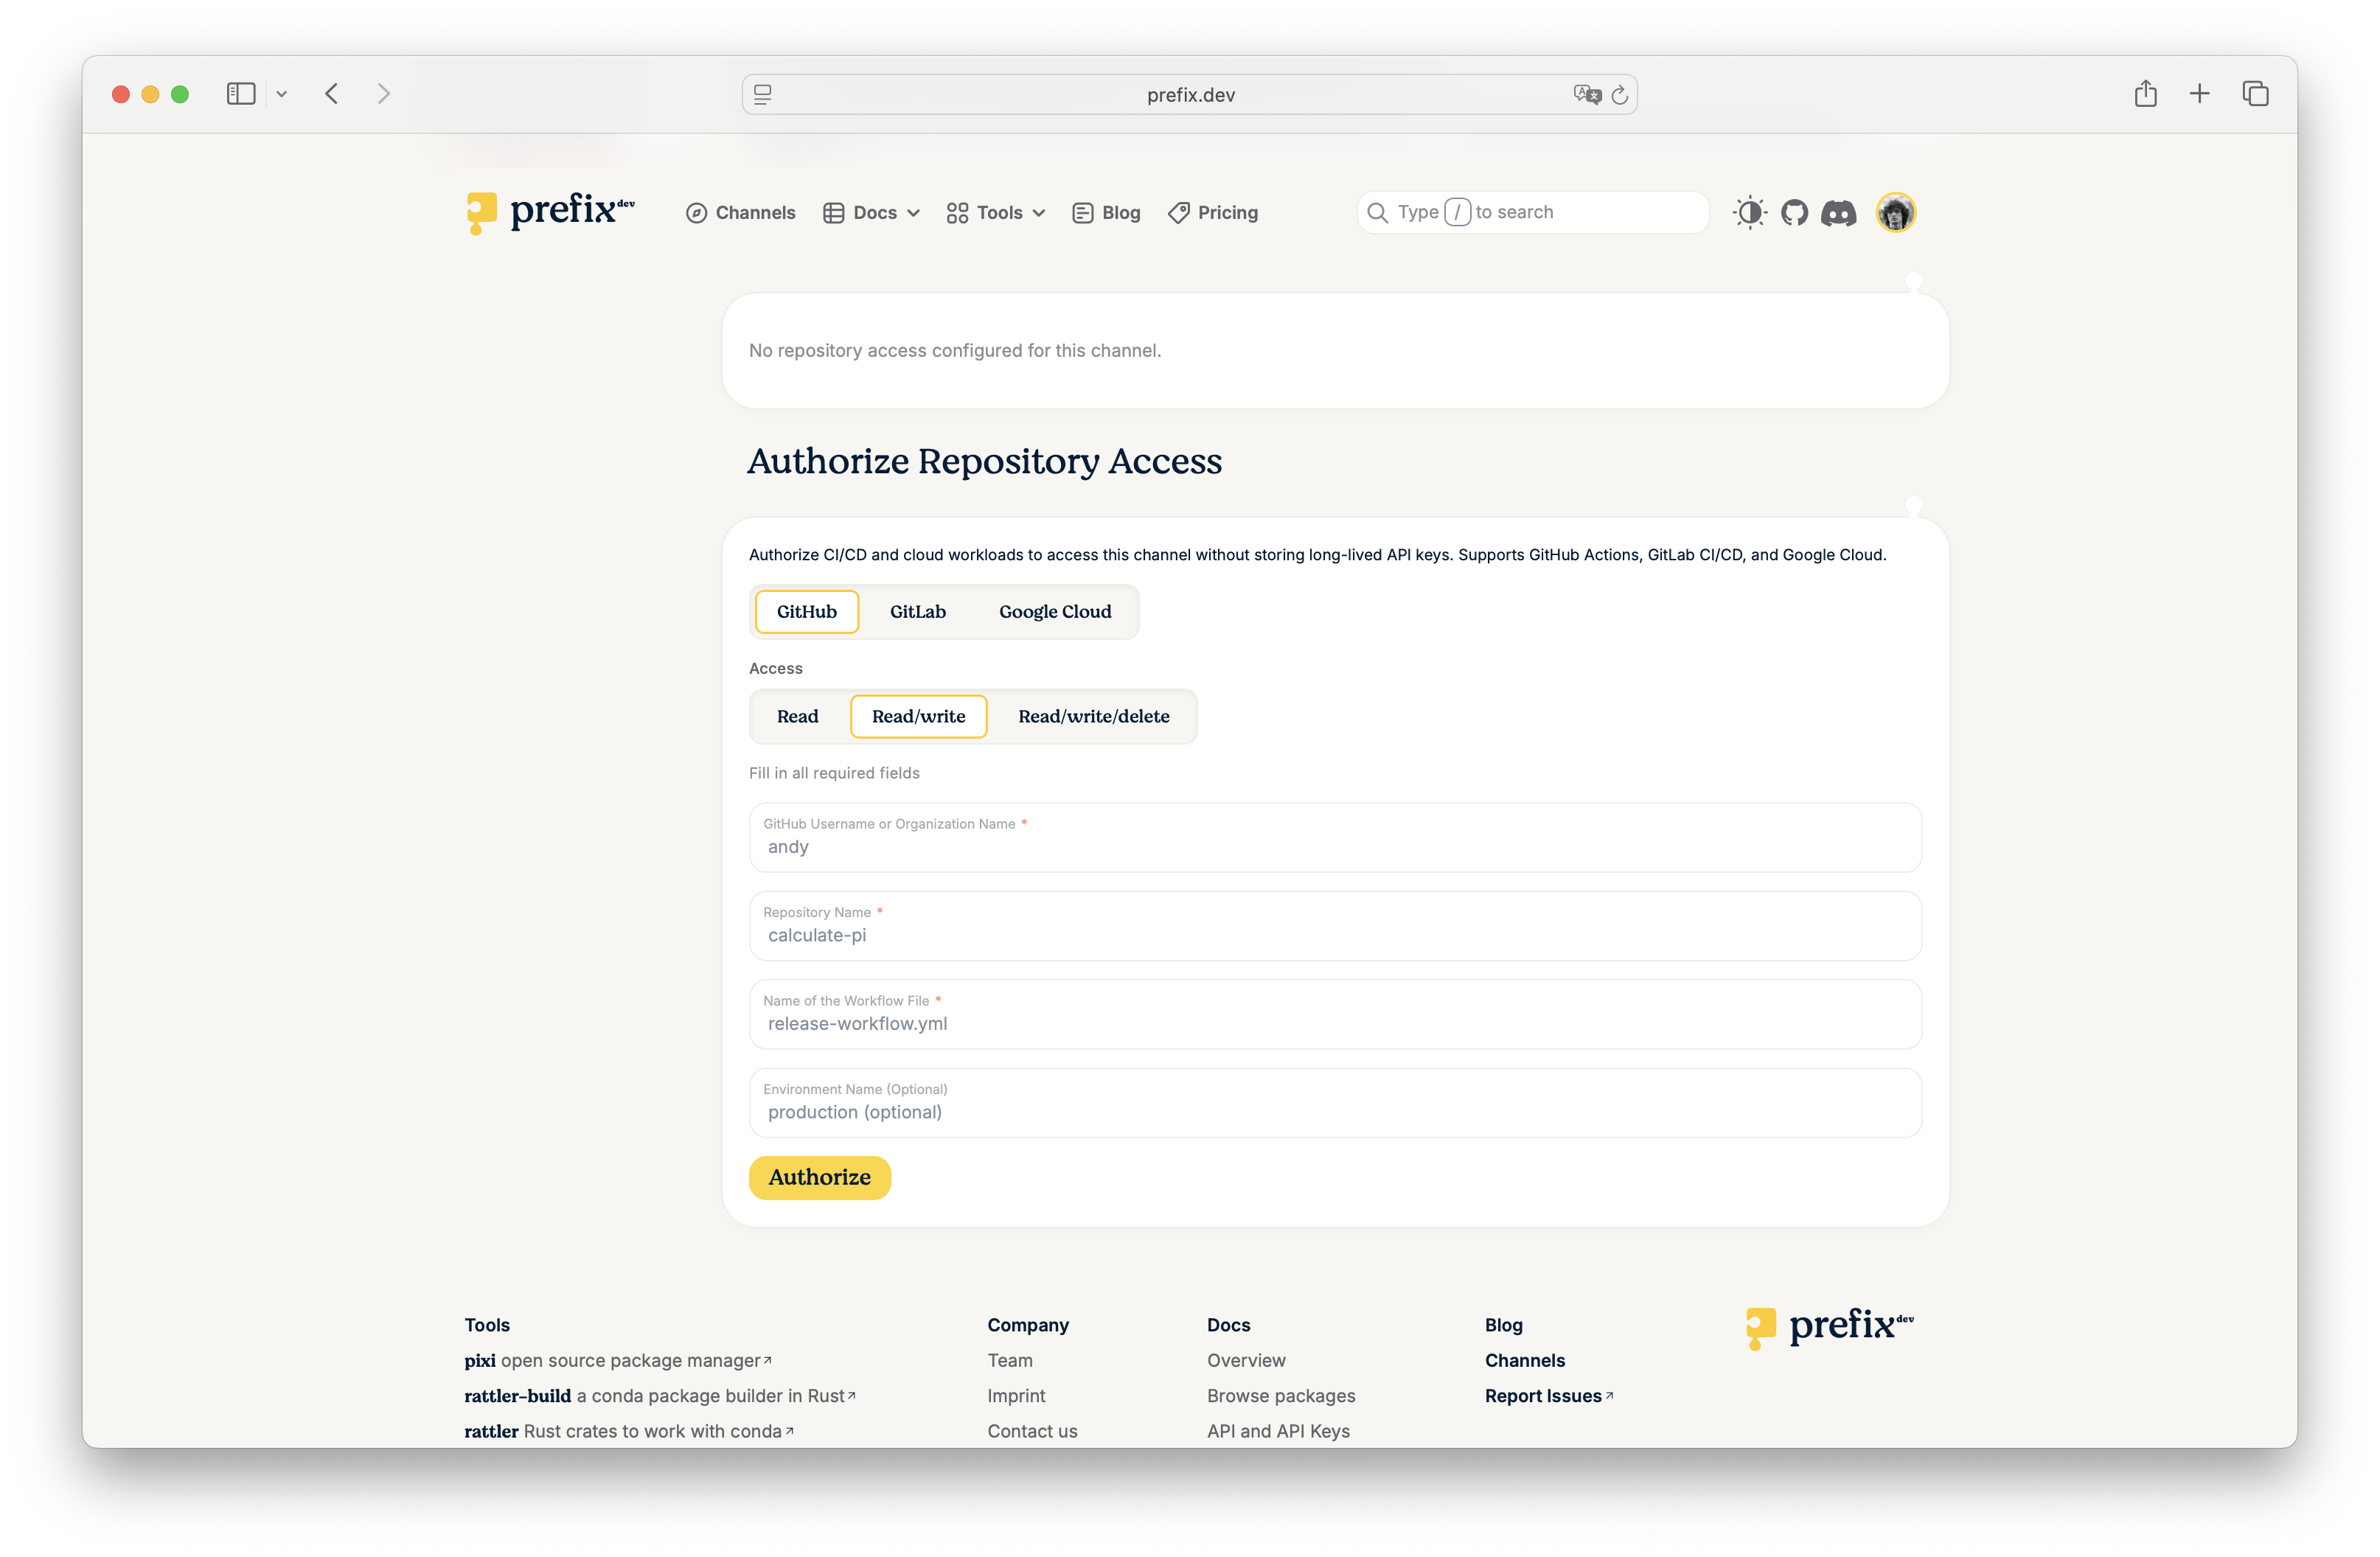
Repository Access (formerly Trusted Publishing): if you are running a workflow on Github, Gitlab or Google this is the recommend way of authenticating. Completely token-less, no secrets that you can loose. We have renamed this to “repository access” because unlike previously you can not just publish a package, you can also configure read-only access (or read-write-delete).
We recommend to use “repository access” wherever possible, and use the least permissions. The repository access flow provides a completely smooth experience with Pixi 0.69.0 (released today!) for pulling packages from a private repository - no keys or secrets to set except for some configuration on prefix.dev.
Quickstart: sign in to pixi with OAuth
Desktop (the default)
pixi auth login prefix.dev
Pixi opens your default browser, you sign in on prefix.dev, you confirm the scopes on the consent screen, and the credential lands in your OS keychain (Keychain Access on macOS, Credential Manager on Windows, GNOME Keyring on Linux).
Headless / SSH / CI: device-code flow
pixi auth login prefix.dev --oauth-flow device-code
Pixi prints a short user code and a URL. Open the URL on any device, paste the code, and pixi is signed in.
In most environments you don’t even need to pass --oauth-flow: the default auto mode picks the right flow for the environment you’re in.
Manual token
pixi auth login prefix.dev --token pfx_…
The bearer-token path is unchanged for CI pipelines that inject tokens from Vault, GitHub Actions secrets, or similar secret stores. We now recommend generating a scoped token rather than a full-account-access one where you can also pick the channel and the exact permissions the token needs.
For CI uploads you likely don’t need any of this: repository access / trusted publishing on GitHub Actions, GitLab CI, and Google Cloud handles the OIDC exchange for you with no stored secrets at all.
Where pixi stores your credentials
macOS → Keychain
Windows → Credential Manager
Linux → GNOME Keyring via libsecret
On servers without a keychain available (for example, no libsecret and no $DISPLAY), pixi falls back to an unencrypted JSON file at ~/.rattler/credentials.json.
Full reference in the authentication docs.
Deep Dive: What “OAuth support” actually means
Two things were shipped under the hood:
1. An OAuth 2.0 and OIDC authorization server
Prefix.dev now implements the standard OAuth/OIDC endpoints (authorization, token, device authorization, JWKS, discovery) and the modern flows:
Authorization Code with PKCE for desktop apps with a browser.
Device Code for CI runners, SSH sessions, and other headless environments.
The consent screen shows the user exactly which scopes the client is requesting, grouped by category. Any OAuth-aware client can integrate against it using the standard OIDC discovery document.
2. A scope system across our API
Every privileged action in the prefix.dev API can now require a specific scope (for example, channel:read, channel:upload), so you can limit what a tool can do on your behalf.
The scope catalog
Scopes are grouped into three categories.
Identity (standard OIDC):
Scope | What it grants |
|---|---|
| Your unique user ID |
| Your username and display name |
| Your email address and verification status |
| Refresh tokens, so an app can stay signed in across sessions |
Channel content:
Scope | What it grants |
|---|---|
| Create new channels on your behalf |
| View and download packages from channels you have access to |
| Upload packages and trigger reindex on channels where you’re an owner or contributor |
| Yank and unyank package versions on channels where you’re an owner or contributor |
| Permanently delete packages from channels where you’re an owner or contributor |
Channel management:
Scope | What it grants |
|---|---|
| Update channel metadata such as description and logo |
| Add or remove channel members and manage repository access |
| Delete channels you own or transfer ownership |
Scopes are subject to change as the API evolves and we may split, rename, or add scopes in future releases. Please refer to the authentication docs for the current set.
Self-hosted OIDC providers
If you’re running a private channel behind your own identity provider — Keycloak, Okta, Auth0, or anything OIDC-compliant — pixi can authenticate against any issuer:
pixi auth login my.private.host \
    --oauth \
    --oauth-issuer-url https://idp.example.com \
    --oauth-client-id my-cli-client \
    --oauth-scope openid --oauth-scope channel:read \
    --oauth-redirect-uri http://127.0.0.1:8000/auth/oidc
Pass --oauth-scope once per scope you want to request.